📱Sign up for SMS and join the PRx Crew! - Sign Up


Build Your Gym
Become A Gym Owner
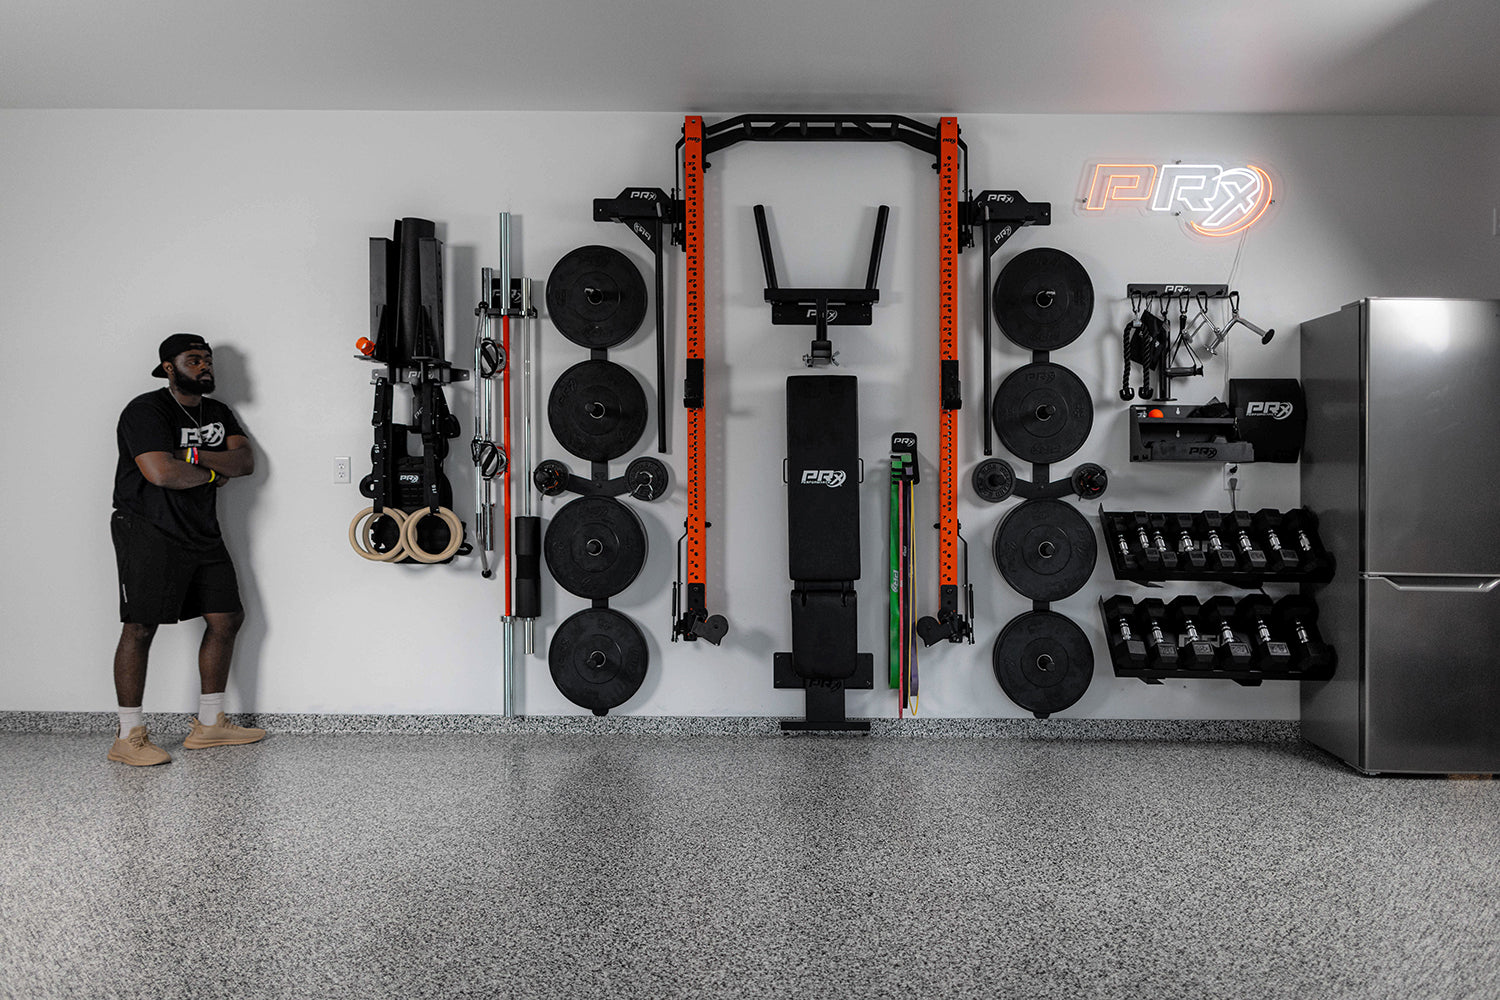
Make your home gym dream a reality. We're here to make it easy. We've outlined the process, from how to pick your rack, to setting up your gym for your first workout. And, as always: if you have any questions we haven't answered, reach out to one of our rockstar Crew members for a free consult!
1
Size Up Your Space
To find a rack that fits your space, measure your ceiling height and stud spacing. Make sure to look for outlets, garage rails, foundations, and sloped floors.
Ceiling Height
Racks
- 95" Profile® PRO Racks are designed for 113" ceilings and can accommodate down to 100" ceilings
- 89" Profile® PRO Racks and 89" Profile® ONE Racks are designed for 107" ceilings and can accommodate down to 94" ceilings
- The shorter (73") Squat Racks are designed for 91" ceilings and can accommodate down to 78" ceilings
- Fold-In ONE Racks are designed for a minimum of 91" ceilings
Stud Spacing
Wood Stud Spacing
- All of our racks require 16" or 24" spaced studs. If your studs are unevenly spaced, a stringer board will be needed to install.
- Our Profile® Flat Folding Bench requires 16" spaced studs. If your studs are 24" or unevenly spaced, you'll need a stringer board.
- All of our Storage Solutions require at least one stud to attach to, a select few require two studs.
Mounting to Concrete/Block/Metal Studs
While our racks are designed to mount to wood studs, they can also mount to other wall types. For more information about mounting to concrete, block, or metal studs we ask that you email us at sales@prxperformance.com. We also recommend consulting a professional installer in your area.
Obstacles
Keep potential obstacles in mind when evaluating your space: Leave a minimum of 32" on either side of the rack (from a wall or barrier) in order to have enough space to use a standard Olympic barbell (up to 86" wide).
2
Pick What Fits
Select a rack and some accessories based on your space and how many studs you have available! Not sure where to start? Our Complete Gym Packages have everything you need.
Folding Racks
Profile® PRO Racks & Profile® ONE Racks
- All racks measure 52" wide and mount to either three or four studs (dependent upon 16" or 24" spaced studs)
- All racks stand 22" out from the wall when deployed. (Does not include Kipping Bar)
- All racks fold up to store 4” away from the wall
- 95" racks recommend 113" to fold upward
- 89" racks recommend 107" to fold upward
- 73" racks recommend 91" to fold upward
Fold-In ONE Rack®
- Takes up 49" of wall space and will mount to either 3 or 4 studs (dependent upon 16" or 24" spaced studs).
- Stands 27" out from the wall when deployed.
- Folds in to store 7" from the wall.
- Only requires 91" of ceiling height in order to fold inward or outward (although we recommend a little more room in order to fully utilize the pull-up bar)
Folding Bench
Profile® Flat Folding Bench
- Our flat folding bench mounts directly between your Profile® Rack uprights with 16" studs. If you do not have 16" spaced studs, you will need a stringer board to install the bench.
- If you have a foundation lip please email us [ sales@prxperformance.com ] to see if the bench will be able to work in your space.
- Dimensions Deployed: 18" x 19" x 63"
- Dimensions Stored: 18" x 5" x 61"
Storage Solutions
All Storage Solutions: WxHxD while in use
Requires One Stud
- 3-Peg Weight Storage: weight plate diameter x 55.5" x 8.5"
- 4-Peg Weight Storage: weight plate diameter x 75" x 8.5"
- Single Bar Storage: 3" x bar height x 4"
- Double Bar Storage: 6.5" x bar height x 4"
- Three Bar Storage: 7" x bar height x 4"
- Medicine Ball Storage: 12" x ball diameter x 12.5"
- AbMat Storage: 12.5" x 15" x 2.5"
- Chalk Bowl: 12" x 8" x 12.5"
- Mobility Band Storage: 6" x 41" x 4.5"
- Kettlebell Storage: 12" x 23" x 12"
- Double Kettlebell Storage: 9" x 12" x 6"
- Battle Rope Storage: 3" x 11.5" x 7.5"
- Weight Vest Storage: 11.5" x 6.5" x 3"
Requires Two 16" Studs
- Dip Station Storage: 18" x 5" x 3.5" Stores dip stations, flat utility bench, a rower or spotter arms (one arm per storage unit)
- Six Bar Storage: 22.5" x 7" x 4"
- Dumbbell Storage: 36" x 12" x 13.5"
- Gym Accessory Storage: 18" x 2.5" x 5"
3
After You Order
Grab the keys, you are now a gym owner! Here are some next steps to getting your gym ready to rock.
Track Order
- After checkout, you'll receive an order confirmation email.
- We strive to get every order sent out in 2-3 business days.
- Once we we print your shipping label, you will receive a shipping confirmation email with your tracking information. Most orders go through FedEx Ground.
- When tracking your packages on the FedEx website, be sure to click the "Multiple-Piece Shipment" tab for accurate tracking information.
In The Meantime
Mark Your Studs
- Use a stud finder to locate your studs and mark them with a pencil.
- Since you already have your plan in place, we recommend noting where you want your equipment to go.
Gather Your Tools
- Check out your rack instructions and see what tools you'll need!
- All wall-mounted accessories require one drill, one 7/32" drill bit, one 1/2" socket and maybe a level and tape measure.
- If you need a stringer board, grab one from a local lumber store so you are ready to assemble when your gear arrives.
Install Your New Gym
If you read the instructions beforehand, your installation will be easy! The time frames described factor in time to read and understand the instructions as you complete the process. View Installation Manuals
Rack installations take between 2-3 hours
- Measure, mark, and drill: 30-45 min
- Align, level, and tighten wall brackets: 30-45 min
- Tightening parts together with bolts: 60-75 min
Storage accessories installations take 10-20 minutes each
Think of these numbers like your last PR - easy to beat as long as you stay the course.